Friday, March 30

Foods with soy: Cranberry Walnut Dressing

Here's another edition of my ongoing series, "Foods you didn't know had soy."  I'm gonna change how I post the series. I'm going to make this a weekly series and post whatever foods with soy I find during the week instead of waiting until I have a certain amount of items.

You would think I'd be jaded and no longer shocked by all the foods I find that has soy, but I am constantly amazed at how many foods contain it. Almost every time I go to the store, I find something else and snap a pic with my iPhone.

Any food items with soy you've found recently that surprised you?  If so, feel free to take a pic and e-mail it to me.  I'll load them up as part of the series.


- Sunshine
*****

This week's entry is Cranberry Walnut Dressing from Naturally Fresh (I'm not even gonna go there with the company name).  Even though I realize that almost every single ready made dressing has some form of soy in it, I'm always surprised when I find it, especially in the refrigerated (i.e. "fresher") brands.


I really like how this flavor combination sounds and think it would be a great fall fruit dip.  I may end up attempting to recreate it.


And, soybean oil aside, since when did sour cream have so many damn ingredients?


Wednesday, March 28

Review: Barbaras Bakery Strawberry Bars

Hey all,

Just a quick note to let y'all know that I haven't dropped off the blog.  Quite the opposite, actually.  I went to the FoodBloogForum Conference at Disney World in Orlando over St. Patrick's Day Weekend and I was so inspired. I have so many great ideas for this blog and my other blog, Scoops of Sunshine.

There has been some behind the scenes work going on for both of the blogs and I have several posts in the works, including a recap of FoodBlogForum Orlando.

In the meantime, I wanted to share a quick product review of these strawberry cereal bars from Barbara's Bakery(affiliate link).


One of the main things we struggle with is having easy, portable, and Porphyria-friendly snacks for Tara so that she can grab them for work or have something quick at home.

That's why I was pretty happy when I saw these bars and checked out the ingredients. Most importantly, it has no soy. I got so excited about a soy free "grain" product that I initially overlooked the slightly less than stellar ingredients like red cabbage and canola oil.


They can be a little hard to find. Only one of my local grocery stores carry the strawberry bars. Whole Foods carries a few different flavors, but that's not always convenient for everyone.

On a final note, Barbara's Bakery has several different type of bars, some of which contain soy, so be careful if you are strictly avoiding it.


TCV Quick notes

Pros: Portable, good amount of carbs, low fat, low protein, quick, convenient, dairy free, soy free, tastes good

Cons: Has a few iffy ingredients, can be hard to find.

Verdict: I would definitely buy these again.
 

Have you tried these bars?

Thursday, March 15

Lasagna Stew


I wasn't too sure if I should share this recipe or not. It isn't exactly porphyria-friendly. Not only is there meat, but there are also tomatoes, onions, fennel, and a good amount of dairy. The only thing that it has going for it is that it has pasta.  To be sure, Tara only had one serving and I ate the rest.


We definitely don't eat like this every day. But here's the thing, we're human and we don't always eat the best.  It's just like when you're on a diet and you eat huge slice of cake (and a bowl of ice cream and some cookies, and a burger...); you know you shouldn't, but you do anyway. And, if you're the type, the next day you go bust your ass in the gym, or, at the very least, you get back on track with your diet.  It's the same thing here.  Tara occasionally  gets cravings for certain foods that aren't so trigger-friendly or we're in a pinch.  So, we try to eat foods before and after that are super high in carbs or she'll drink a Gatorade.


Anyway, enough of that and on to the recipe. Or the discussion of the recipe...


I initially saw Pass the Sushi's post on Lasagna Stew and it looked so good that I knew I was going to make it soon, like either that night or the next day, soon. 

Thankfully, my version of lasagna soup - Lasagna Stew - did not disappoint!  Honestly, the main reason I decided to post the recipe was because, people, this is good. I mean, really good. I'm not sure if it's because I love a good meat sauce and I rarely get to enjoy it, but I was savoring the sauce like nobody's business.


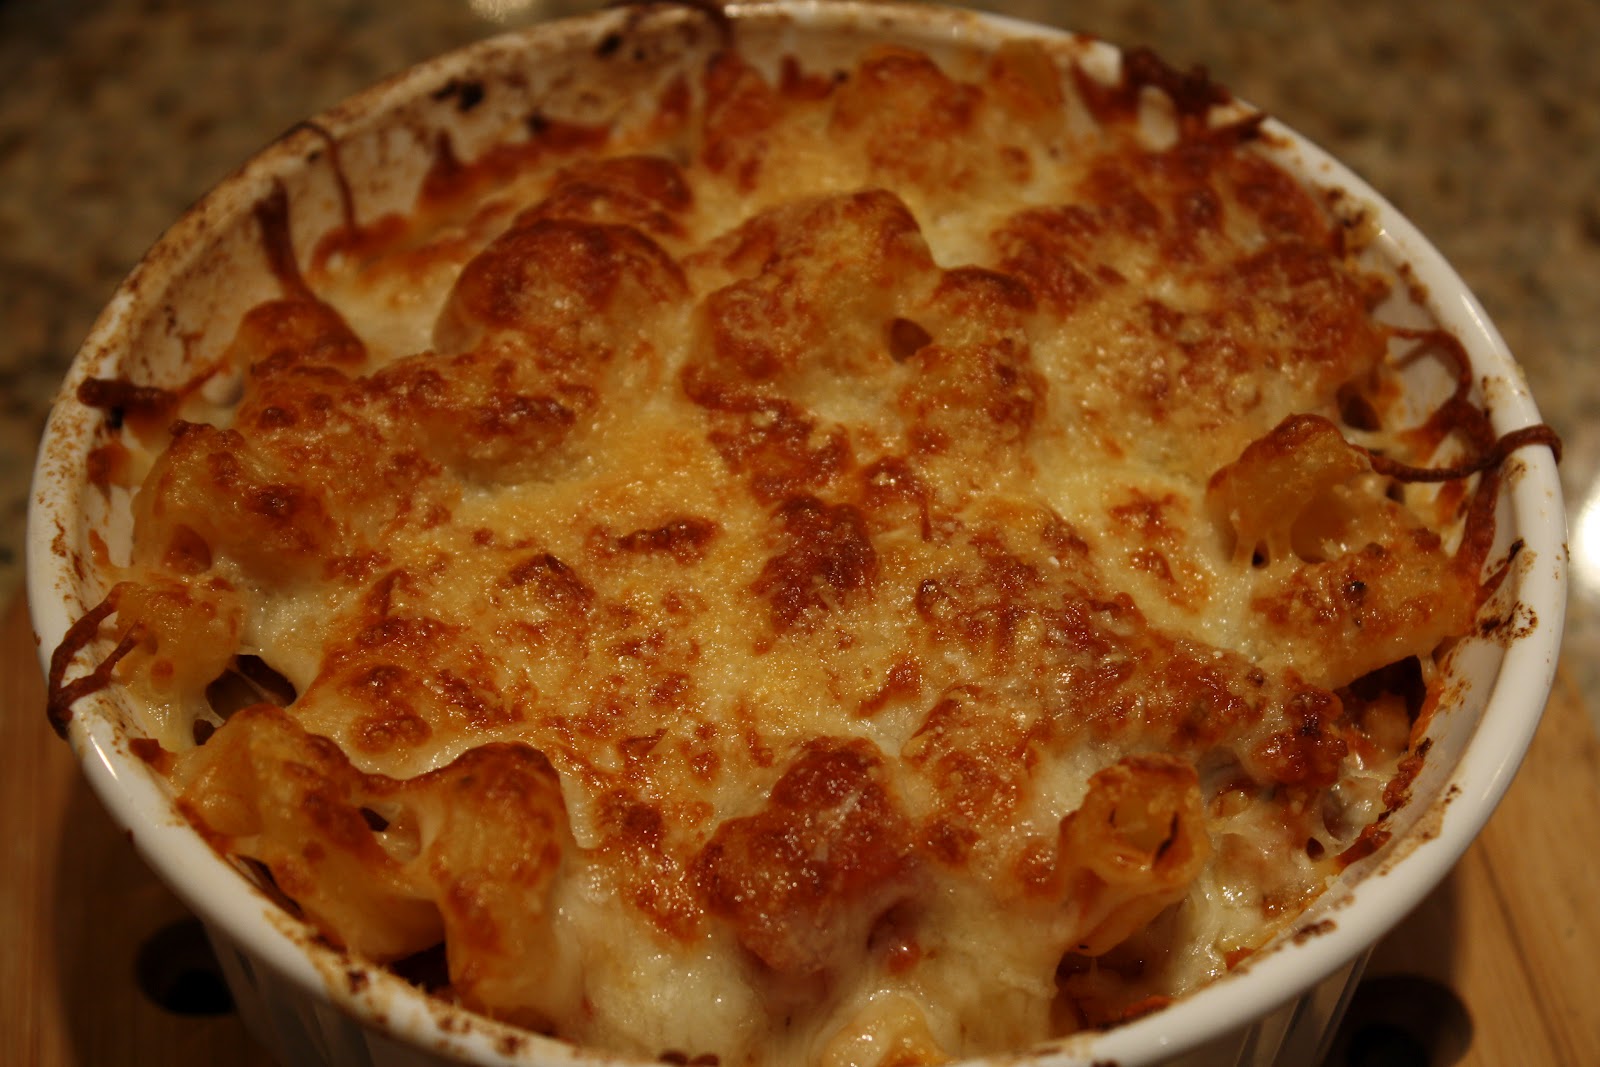
It doesn't taste quite like lasagna, but it is very lasagna-esque.  You know, kind of like a cousin of lasagna.  All the elements are there: meat sauce, pasta, ricotta, and browned mozzarella topping.  They just combine to form something fabulous.


Despite what I said earlier about this lasagna stew being essentially a trigger-bomb, it is quite customizable. It can easily be made vegetarian by replacing the meat with veggies like mushrooms and/or zucchini, etc.. It can be made dairy-light or even dairy-free. You can change up the spices somewhat by leaving out the fennel and upping the basil, oregano, and bay lead. I suppose it could even be made onion-free, too, although I'm not entirely sure because, at that point, it would probably be another dish entirely.


Lasagna Stew

Adapted from Pass the Sushi and Closet Cooking  and

Don't let the long list of ingredients fool you; this comes together fairly quickly.  If you want to make this more soup-like, increase the chicken stock to at least 4 cups. 

Ingredients

  • 1 tablespoon olive oil
  • 1 1/2 lb Italian sausage, casings removed
  • 2 medium - large onions, finely chopped,
  • 4 cloves garlic, minced
  • 1/4-1/2 teaspoon red pepper flakes
  • 1/2 teaspoon fennel seeds, crushed
  • 3 tablespoon tomato paste (organic preferred)
  • 1 28oz can diced tomatoes, with juice
  • 1 14oz can diced tomatoes, with juice
  • 1 1/2 cups, approximately, chicken stock
  • 1 bay leaf
  • 1 teaspoon dried oregano
  • 8oz pasta (mafalda would be appropriate, but any big pasta will do)
  • 1/2 cup finely chopped fresh basil (I left this out)
  • Salt and pepper, to taste
  • 8oz ricotta cheese
  • 1/2 cup grated Parmesan
  • 2 cups shredded mozzarella

Directions

In a large pot (either a sauce pot or a large, high-sided skillet), heat oil over medium heat. Add sausage and cook until brown, breaking up into small chunks, until no longer pink, about 5 minutes. Transfer to a bowl and set aside (this step is optional, but it will help the next step go quicker.).

Add onion and sauté until soft, about 5 minutes. Add garlic, red pepper flakes, and fennel and sauté for about 1 minute. Stir in tomato paste and cook for 5 minutes or so.

Add to the pan tomatoes with juice, sausage (if you removed it), stock, bay leaf, and oregano; bring to a boil. Reduce heat and simmer for about 30 minutes to blend the flavors.

While sauce simmers, bring a large pot of salted water to boil. Dump in the pasta, boil for a minute or so, turn off the heat and cover. Let sit for 10 minutes, stirring occasionally, or until the pasta is cooked to your liking. Once done, drain and return to the pot.

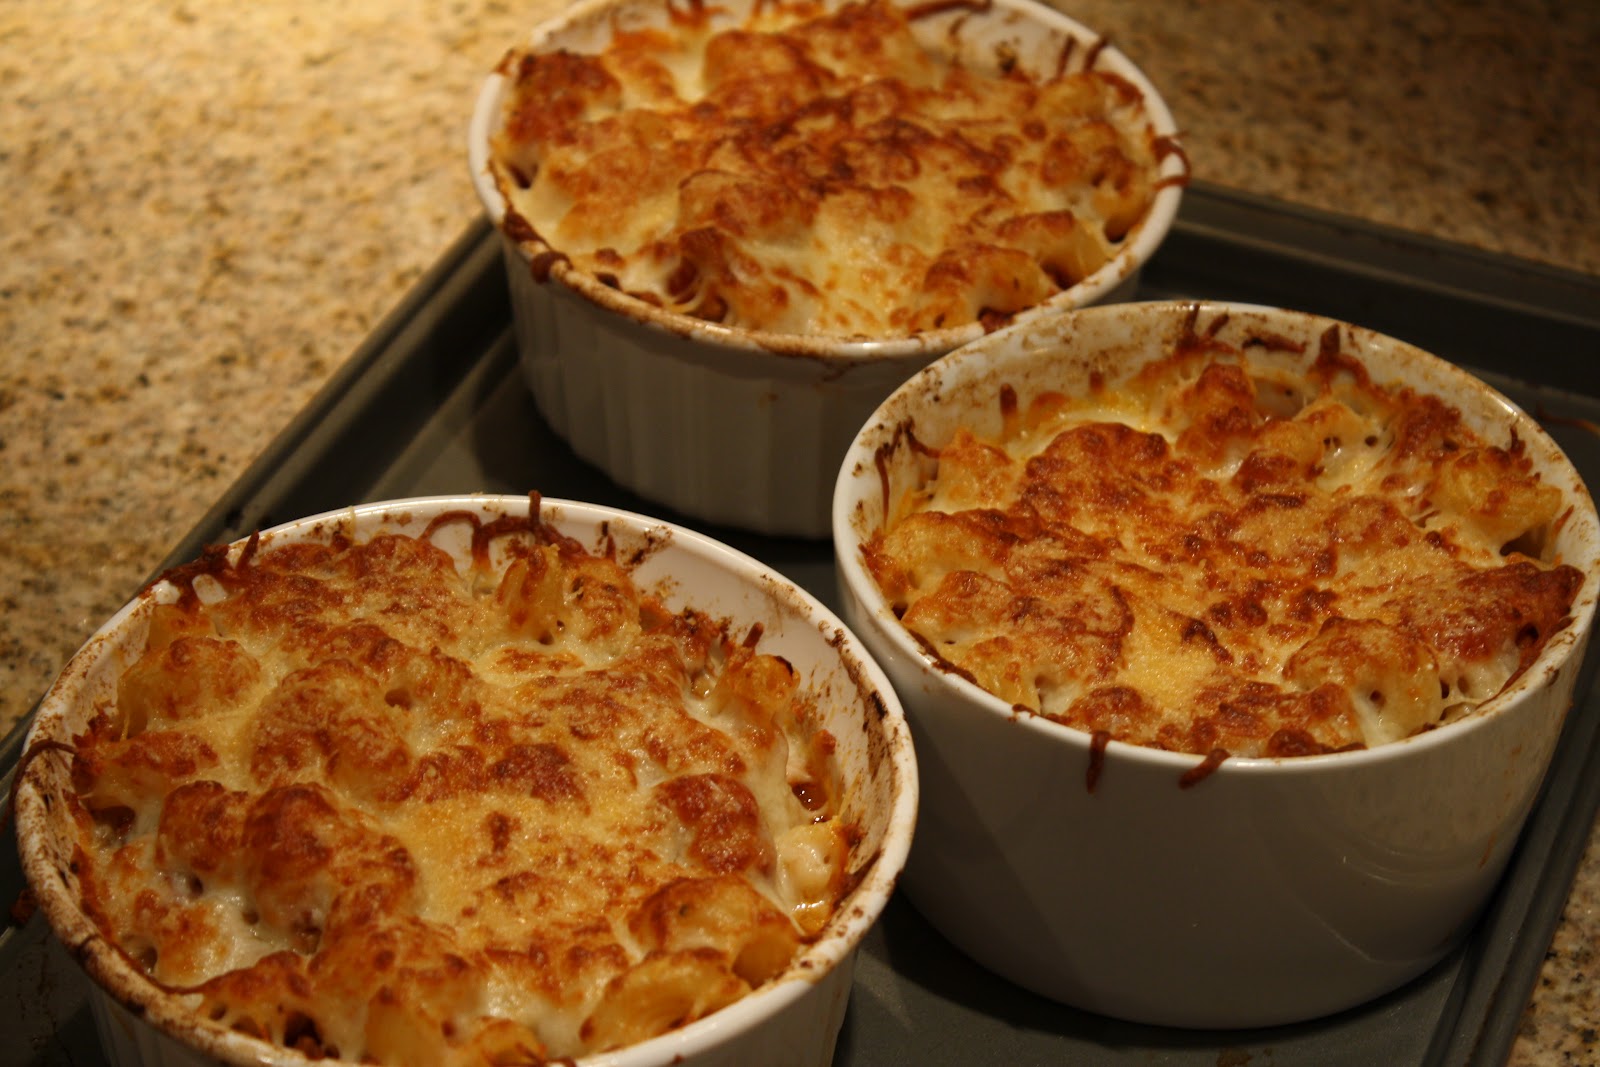
While the sauce and pasta is cooking, preheat the oven to broil and place oven safe bowls on a baking sheet.

When the pasta is cooked and the sauce is done simmering, fish out the bay leaf and discard. Stir in basil and season with salt and pepper to taste. Then stir in pasta.

Scoop a heaping spoonful of ricotta into each bowl. Ladle stew into bowls and top each bowl with Parmesan and mozzarella cheese. Place in broiler with oven door cracked for 3-5 minutes or until cheese browns.

Wait a few minutes before serving because the stew will be super hot.


Recipe variations:

Vegetarian:  Replace the meat with any number of vegetables, but especially mushrooms. Replace the chicken broth with vegetable broth or water.

Dairy-free or dairy-light:  Decrease the amount of ricotta used in the lasagna and decrease the amount of topping. If you are just looking for a little bit of dairy, I would eliminate all but a smidge of the topping.

Fennel-free:  Leave out the fennel and, if you are using a meat, use ground pork and beef in place of the sausage. Increase the rest of the seasonings, especially the salt, pepper and bay leaf, and double the basil by adding it to the sauce while it is cooking and then at the end.

Gluten-free:  Use any gluten free pasta you prefer.

Onion-free:  I am guessing about this one. Leave out the onion and significantly increase the seasonings. I would add 2-3 bay leaves, add the larger amount of red pepper flakes (assuming you can handle heat), increase the oregano (add some fresh, too, if you have it), and double the basil by adding it when the sauce is cooking and then at the end.

If you try out any of these variations, please let me know how they work for you or what you did or would do differently.

Wednesday, March 7

Arugula Pesto


This is another one from the unposted archives.  It is, however, a timely one.  Tara and I have been in a dinner rut recently, falling back on dishes that rely heavily on tomatoes. While they're good, I really need to make an effort to seek out some tomato-free pasta (and other) dishes.

I was doing a search on tomato-free pasta dishes and what came up were tomato-free pasta sauces that included things like beets, roasted red peppers, and sometimes squashes.  That's all well and good, but I need something fairly easy and that doesn't require lots of steps.  Then, as I was going through my draft posts, I happened upon this one for pesto.  And I literally hit myself on the forehead.

How could I have ever forgotten pesto as a great, tomato-free pasta dish?!  (Incidentally, it is also onion-free and could be made garlic-free.)  The preparation is fairly simple and can probably be done in under 15 minutes.  Basically, in the time that it takes to cook your pasta, you could have the pesto ready.    


Arugula basil pesto

Use this recipe as more of a suggestion and starting place than a concrete, hard and fast rule.  With the seasonings, garlic, olive oil, etc., start with a little bit and keep adding until you are satisfied with your result.  Also, use all pine nuts or use all pumpkin seeds.  Toast the nuts or don't toast.  Use more basil and less arugula.  Etc.  Basically, make it yours.

Updated 4/3/12 to add: Arugula can be a little bitter.  If your pesto is too bitter, add more basil to counter balance.  If that doesn't work, top your final dish with a good amount of shredded Parmesan.  I find that works for me.

You can use a mortar and pestle for small batches, but definitely break out the food processor or blender for bigger jobs.

Ingredients
  • 2 large handfuls of arugula
  • 1 very small handful of basil leaves
  • 1/4 cup pumpkin seeds, toasted
  • 2 tablespoons pine nuts, toasted
  • 2 teaspoons garlic*
  • ~ 1/4-1/3 olive oil*
  • 1-2 tablespoons lime juice (optional)
  • salt and pepper (to taste)
  • Freshly grated Parmesan (to taste, but at least 1/4 cup)*

Directions

Pulse arugula and basil in food processor a few times. Add pumpkin seeds, pine nuts, and garlic; pulse a few times. Turn your food processor on and drizzle in olive oil through the feed tube. Turn off the food processor and check the consistency; add more olive oil and pulse if you need to.  Add in a bit of lime juice, maybe a teaspoon or so at a time, and pulse; check the flavor as you add until you get it to where you like it.  Add salt and pepper to taste and pulse to disperse; again, check the flavor as you add until you're satisfied.

Serve with pasta and sauteed mushrooms.

Notes:

1. You can make this garlic-free by leaving out the garlic (duh...).  The arugula has a nice, spicy kick, so the garlic probably wouldn't be missed.  You might need to punch up the lime juice and pepper to compensate, though.  I haven't tried it, but let me know how it works if you do.

2. As you can tell from the photos, we like our pesto on the paste-y side where it's almost as thick as a spread, so we use only a little bit of olive oil - just enough to thin out the mixture a bit.  Most people seem to like their pesto thinner; if you are one of those, use more olive oil.

3. Regarding the Parmesan, if you are baking a large batch and planning to freeze, don't include the Parmesan.  Sprinkle the Parmesan on your dish when you mix in the pesto.  If you are not planning on freezing, you can mix in the Parmesan while everything is in the food processor.  That said, we rarely add Parmesan to the pesto anyway, because Tara doesn't like it on her pasta so much.

Thursday, March 1

Oatmeal whole wheat bread

Ignore the fantabulous background and focus on the totally awesome looking bread.

Now that the blog is up and running, I can finally get to those posts that have been languishing in my cue for over a year.

When I first started making homemade bread, I was super excited because I conquered (mostly) my fear of yeast and - Hello! Homemade bread!


But, unfortunately, I haven't made any bread in a while.  Tara isn't much of a fan (she likes plain ol' white bread) and there's only so much that I can eat.  Because of that, it either goes bad or I have to freeze it for some yet-to-be-determined use.  So, I just kind of...stopped.

However, looking at these photos is making me hungry for some fresh bread.


I had a few problems with this dough.  Mainly, it was incredibly large and very unruly. It didn't just double; I think it quadrupled in size. I've learned a little bit more about bread-baking and now realize that the dough rose too much, probably because it was super humid and warm.

I also converted the yeast in the recipe from active dry to instant or rapid rise without reducing the amount; that may have played a part as well. I have fixed the amount in the recipe below.


I should have proceeded with the shaping and baking when the dough was the right size, not according to what the recipe said. I'm learning that, while the recipe is important, some skill and experience is also helpful.  This is true of any baking or cooking, but it seems especially important with bread-baking.


I somewhat prefer the free-form loaf look, but I'm also a little scared of making a sandwich loaf.  (It's silly, I know, but still...baby steps.)  My loaf was probably no more that 2 and a half inches high at it's tallest spot. 


I paired this with a few things, but my favorite was a smear of organic tomato paste (it must be organic,  Trust me; it's totally worth the extra few cents.) and soft cheese like cream cheese or those Happy Cow wedges.  I'm sure it would be a great sandwich bread, especially if you like whole wheat, slightly sweeter breads.  Mine wasn't exactly conducive to sandwich making, though, because of its funky shape.  


Little visitor. 


Oatmeal Whole Wheat Bread
barely adapted from Cafe Fernando, adapted it from “Good to the Grain” by Kim Boyce.

I mixed the dough in my stand mixer, but I will give instructions for doing it by hand.

Ingredients

  • 2 cups warm water
  • scant 2 tsp instant / rapid rise yeast
  • 3 tbsp unsulphured molasses
  • 2+1/2 cups whole wheat flour
  • 2 cups bread flour (or all-purpose flour)
  • 1 cup rolled oats
  • 4 tbsp unsalted butter, melted and cooled slightly
  • 1 tbsp kosher salt
Directions

Stand mixer: In the bowl of a stand mixer, add yeast, water, molasses, melted butter, oats, and half the flours.  Using the paddle blade, blend until smooth. Stir in remaining flours with a wooden spoon.  Cover with a towel or plastic wrap and let stand for 30 minutes.

Add salt to the dough, attach the bread hook to the mixer and mix on medium speed for 6 minutes, until the dough no longer sticks to the sides (add a tablespoon or two of flour if necessary).  While the dough is mixing, lightly butter a large bowl.  Scrape the dough onto a lightly floured work surface and knead it a few times. Proceed below.


By hand: Combine half the flour with the oats and yeast in a large bowl and stir to blend.  Add the water, molasses, melted butter and stir with a wooden spoon until smooth.  Stir in remaining flours.  Cover with a towel or plastic wrap and let stand for 30 minutes.  Lightly butter a large bowl.  Add salt to the dough.  Knead until smooth, about 10 minutes.  Proceed below.

Put the dough into the buttered bowl, cover with a towel or saran wrap, and let it rise for about 1 hour, or until it is doubled in size.

Free-form loaf shape: Scrape the dough onto a floured work surface. Shape the dough by bringing the sides of the dough to the bottom.  Squeeze and pinch the seam closed tightly.  Do this a few more times, making sure that you shape the loaf into an oval shape the last time.  Put the dough on a lightly floured surface, sprinkle with a little flour, and cover with a towel or plastic wrap.  Let rest until the dough puffs slightly, about 20 minutes.  Pinch the bottom of the oval to seal the seam as best you can.  Sprinkle all over with flour and put on a well-floured baking sheet.  Let rise, covered, until it doubles in size again, about 1 to 2 hours.  


Sandwich loaf shape: Shape it into a square, then fold it down from the top to the middle and then up from the bottom to the middle (just like you fold a letter). Bring the top and bottom edges together, pinch and seal.  Place the dough in the pan with the seam side down, and press it gently into the corners of the pan. Cover the dough with a towel or plastic wrap, and let it rest in a warm place for about 1 hour, or until the dough doubles in size again.

About 30 minutes before you're going to bake, heat the oven to 450F.  If you have a pizza stone, put it on the bottom rack.  If you don't, on the oven floor, put a shallow ovenproof pot (I use 2 old metal bread making pans) half-filled with ordinary (but clean) rocks.  Boil some water.  Just before putting the bread in the oven, carefully pour boiling water to just over the top of the stones.  Close the oven door.  A minute later, put in the bread and start baking, turning the heat down to 400F.

Bake until the internal temperature of the bread is at least 210F on an instant-read thermometer, about 40 to 60 minutes.  Remove and cool on a wire rack.
Related Posts Plugin for WordPress, Blogger...