Showing posts with label vegetarian. Show all posts

Wednesday, November 24

Cashew nut butter

I realize that tomorrow is Thanksgiving and I should probably post a more appropriate recipe, but this is what I have ready, so this is what you get!  There are a few Fall/Thanksgiving appropriate dishes on the blog that you can check out if you need some last minute inspiration, though.


I enjoy making my own nut butter flavors at home.  They're relatively easy and you can experiment with any number of nut/flavor combinations you can think of. I'm still experimenting with flavors, but so far, I've made plain pumpkin seed butter (can't wait to try this with some cinnamon, nutmeg, or ginger or all 3), maple cinnamon pecan butter (OMG, to die for, recipe coming soon), and this cashew butter.   


Nut butters can be used in the same way that you would use peanut butter: sandwiches, cookies (recipe coming up for cashew butter cookies), granola, smoothies, etc.

For the sandwiches below, I made a "Peanut butter & jelly" sandwich, but with the cashew butter and lingonberry preserves (cranberry sauce would work well, too). I gotta say, it was a pretty outstanding sandwich as far as PB&J goes.


Cashew nut butter

This is more of a concept than a hard and fast recipe; you can scale this up or down and add as little or as much flavorings as desired.  I prefer to roast my own nuts so I can add any liquids before roasting and allow for caramelization.  However, you can use already roasted nuts and add your liquids in the processor; just use a little bit less.  Also, if you don't want to add the honey, you shouldn't need to add any oil; for some reason the honey clumps up the cashew butter.

Ingredients

  • 16oz (1 pound) cashews
  • 2-3 Tablespoons honey, or to taste
  • ~1 teaspoon salt
  •  5 teaspoons oil (I used a combo of grapeseed and coconut)

Directions

Preheat oven to 350F.

Coat cashews with honey (and any other flavorings).  Roast for 8-10 minutes, stirring occasionally,  until they're a light golden brown; keep an eye on them because under done is better than over done in this case! 

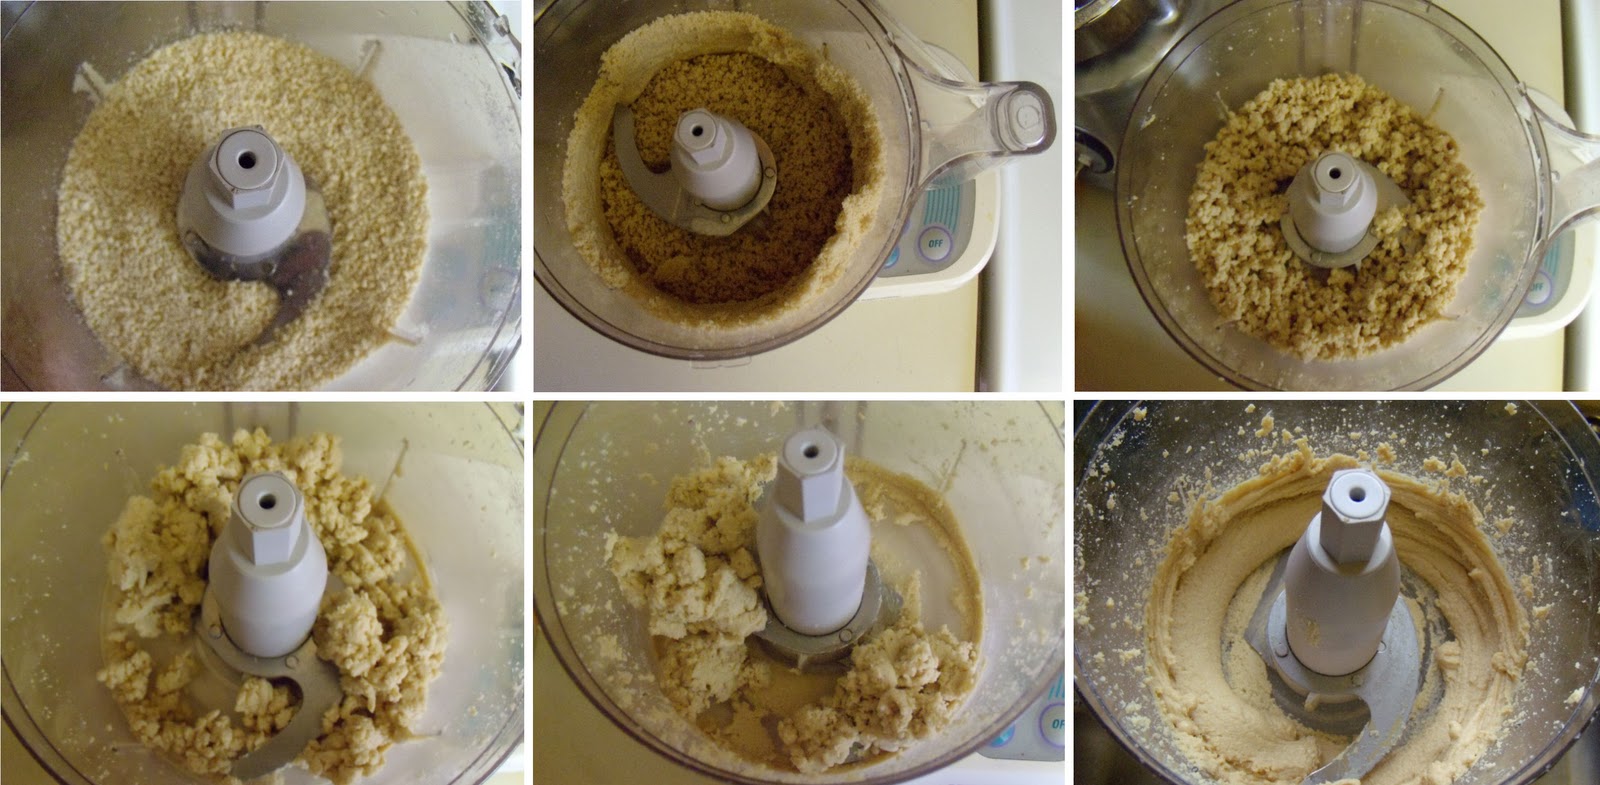
Place nuts in food process and process until the texture doesn't change anymore, stopping regularly to scrape down the bowl.  The nuts will go through several stages (check out the above pic) and it might take awhile - 15 minutes or so. Add the salt and slowly pour in the oil.  Process until you get a fairly smooth consistency.

I store my nut butters in old glass peanut butter jars.  They'll be fine out of the fridge for a few months, but if you're unsure, you can store them in the fridge.


Friday, November 19

Couscous and sausage stuffed mushrooms

My meals have been less than inspired lately. It's been difficult for me because not only does Tara have the dietary restrictions due to her Porphyria, but she's pretty picky, too; top that off with the fact that she's still recovering from jaw surgery and you could understand my frustration. Soooo, we've been eating lots of pastas and cobbled together meals of leftovers.

Mark Bittman to the rescue! The NYT recently re-shared Bittman's Top 101 Head Starts on the Day from 2009.  I found so many ideas that I ended up making my own list of favorites.  Expect to see some of them in upcoming posts.  


A few things:

First, I normally have a loooong turn around time from cooking/eating a recipe to blogging about it.  Not this dish.  I made it just a few days ago and it was so good that I had to post about it as soon as possible.  Plus, it's perfect for Thanksgiving.

Second, HUGE apologies for the bad quality of photos.  I was working with the double whammy of my iPhone and bad lighting.  Normally, I wouldn't blog a recipe if the pictures looked like these, but Tara loved this dish, so I had to share. Again, it was that good!

Third, Bittman doesn't give very detailed instructions, so I kinda had to wing it as far as writing the recipe.


Couscous and sausage stuffed mushrooms
Adapted from Mark Bittman, via The New York Times (#39)

I changed a few things in the "recipe" based on what was on hand and how much time I had.  Mainly, I used couscous instead of rice, a shallot instead of onion and garlic, and a mixture of Fontina and Gruyere cheese instead of the Parmesan.  In the spirit of the recipe, I didn't measure, so take the ingredient amounts as a guide rather than an absolute, especially with the couscous, bread crumbs and cheese.

Ingredients

  • 1 tablespoon olive oil
  • 8 oz button, cremini, or portobello mushrooms
  • 2 smallish mild Italian sausages, removed from casings and crumbled
  • 1 shallot, chopped
  • 1-2 cloves garlic, minced (optional)
  • ~ 3/4 cup cooked couscous
  • 1 egg
  • ~ 1/4 cup soy free bread crumbs (I used Ian's Panko.)
  • ~ 1/4 cup of grated cheese

Directions

Preheat your oven to 350F.

Add oil to a large skillet over medium heat.  Cook the sausage until it begins to brown. While the sausage is cooking, trim mushrooms and chop stems (do this first if you're not confident in your speedy kitchen skills).

When the sausage starts to brown, add stems, chopped onion, and garlic (if using).  Stir often.  (Time saving tip: Grate your cheese while waiting for the mixture to cook.)  When the mixture is cooked, remove from heat and transfer to a bowl.  Add cooked couscous, egg, bread crumbs, and cheese. The mixture should stick together a little bit, so feel free to add cheese and bread crumbs as needed.

Spoon the stuffing into the mushroom caps (and ramekins for the extra mixture) and bake until tender, about 15 minutes.

Vegetarian option:  Increase the mushrooms to 12-16oz.  Dice half and cook with the stems.  Season with black pepper and fennel.  

Onion free and garlic free option:  Replace the shallot and garlic with 1-2 stalks of diced celery.

Monday, November 15

Granola with quinoa and seeds


I eat granola almost every weekday morning for breakfast, but until recently, I've never actually made my own.  Any of the recipes I saw seemed too complicated or they had ingredients that I didn't want to use like corn syrup and/or oil (wtf?), or or they included nuts/seeds that I didn't have. So, even though I always check every recipe that I see, I've never once attempted to make it...until I saw a recipe for Quinoa Granola over at Fake Ginger.


At the time, I had a huge amount of red quinoa that I wanted to get rid of (even after using it in the Quinoa and sausage stuffed acorn squash), so it seemed like the perfect opportunity to both make granola for the first time AND use up the quinoa. I can't say that I would have ever thought to use quinoa in granola, but it makes sense since it's actually a seed.


Unfortunately, once I made and tasted the recipe, I wasn't entirely happy with the outcome.  First, it wasn't sweet enough.  Second, there was so much quinoa that, because it turned hard during baking, it made for difficult eating.


But, all was not lost because I finally realized just how easy it was to make granola and how infinitely customizable it is! Initially, I set out to make granola that tasted similar to my favorite commercially available granola, Oats and honey by Cascadian Farms.  So, I modified the original recipe primarily by increasing the honey and decreasing the quinoa; I also added some other nuts, seeds, and flavors.  I've made it several times now and each version is better than the previous.

See the puffed rice in the mix?

As a bonus, I found that I could make this granola gluten free without spending a ton of money on gluten free oats.  I've tried a few batches with puffed rice, both mixed and 100%, and it ended up working very well.

[Our camera is on the fritz so these pics below (plus the header pic) were taken with my iPhone.  Not too shabby, might I add.]


Granola
Inspiration from Fake Ginger

~10 1-cup servings

For the mix that's pictured above, I used a combination of puffed rice and oats; a nut and seed mix that included 1 cup walnuts, 4 tablespoons each of pumpkin and sunflower seeds, 4 tablespoons quinoa (rinsed and spread out to dry), and 2 tablespoons sesame seeds (which are on the restricted list, but Tara isn't eating this stuff anytime soon, so no worries); and for the fruit, I used cranberries. 

Ingredients
  • 6 cups old-fashioned oats and/or puffed rice
  • 2 cups mixed nuts and seeds
  • 1 cup applesauce (or baby food)
  • 3/4 cup honey
  • 1/4 cup sugar
  • 1 tablespoon molasses
  • 1 teaspoon vanilla
  • pinch salt
  • sprinkle cinnamon
  • 1 cup dried fruit
  • Optional additions: flax meal, protein powder, wheat germ

Directions:

Preheat oven to 300.  Coat a baking dish or 2 with oil (preferred) or line a baking sheet with parchment paper.

In a large bowl, combine oats, nuts, and seeds. Set aside.

Stir together applesauce and/or baby food, honey, molasses, vanilla, salt, and cinnamon. (This is where I add in my optional ingredients, too.  I feel that mixing it with the liquids gives it a better distribution.)  Taste and add more flavorings as needed. Pour over oat mixture and stir to moisten all of the ingredients. Spread the mixture onto prepared baking dish.


Bake for 40 – 50 minutes, stirring occasionally, until granola is golden and slightly crunchy (Don't cook it until it is totally crunchy because it will crisp up as it cools).  Remove from oven and stir in dried fruit.  Let cool and store tightly covered.

Notes: If you don't have a glut of baby food like us and are using applesauce, you may want to leave out or reduce the sugar, especially if you're not that into sweet stuff.  By the same token, if you are using a flavored or sweetened protein powder, you may want to decrease or eliminate both the sugar and the vanilla.


Monday, November 8

Penne a la vodka


I know people like to knock Rachael Ray, but all of her recipes that I have made (and it's only been a few) were very approachable and relatively easy to make.  This recipe is no exception.  I mean, even Deb from Smitten Kitchen made it.


Rach's dish is somewhat annoyingly titled: You Won't Be Single For Long Vodka Cream Pasta.  But, it is Tara's favorite meal that I make for her.  She requests it for her birthday every year plus she likes me to make it for special occasions. Other people buy their wives flowers; I make mine penne a la vodka!  So, even though I haven't been single for many years (almost 10, people!), it certainly keeps me from being single again!

(By the way, the Decadent Duo for Decadent Duos: Chocolate Cups with Whipped Cream from the same episode is pretty phenomenal.) 


I've tweaked this recipe so much over the years, per Tara's requests, that we've pretty much made it our own. Mainly, I added some heat with red pepper flakes and made it chunkier by increasing the amount of shallots, adding cut up stewed tomatoes, and eliminating the chicken stock.    


Incidentally, I rarely drink any form of alcohol - I can count how many drinks I imbibe in one year on one hand - and I certainly don't buy alcohol for drinking.  So, the first time I had to buy vodka for this recipe (normally I send Tara), there was a sale on the larger, 1.5 liter, bottles.  The irony of a non-drinker buying a rather large bottle of vodka was not lost on me.  Also ironical is how decently stocked our liquor cabinet (shelf, actually) is due to my willingness to use multiple varieties in my cooking and baking. 


Penne a la Vodka
Liberally adapted from Rachael Ray

Serves 4

If you want to make this alcohol free, swap the vodka for a half cup of chicken or vegetable broth (or water in a pinch); add it in with the tomatoes.

Ingredients
  • 1 tablespoon extra virgin olive oil
  • 1 tablespoon butter
  • 4-5 shallots, chopped
  • 2 cloves (or 1-2 teaspoons from a jar) minced garlic
  • red pepper flakes to taste (~1/4 tsp)
  • 1 cup vodka
  • 1 large (28 oz) can crushed tomatoes*
  • Salt and pepper to flavor
  • 16 oz penne pasta
  • ½ cup heavy cream
  • 20 leaves basil, shredded/torn (optional)
  • grated parmesan cheese (optional)

Directions

Heat a large skillet over medium heat. Add oil, butter, and shallots.  Gently saute shallots for 3-5 minutes to develop sweetness.  Add garlic and red pepper flakes to the pan and saute for a minute or so.  Add vodka to the pan and reduce by half (2-3 minutes).  Add tomatoes to pan.  Bring sauce to a bubble and reduce heat to simmer.  Season with salt and pepper.

While sauce simmers, bring a large pot of salted water to boil.  Dump in the pasta, boil for a minute or so and turn off the heat, add 1 tablespoon of the oil, and cover.  Let sit for 10 minutes, stirring occasionally, or until the pasta is cooked to your liking.  Once done, drain and return to the pot.

Stir cream into sauce.  When sauce returns to a bubble, remove from heat. Toss hot pasta with sauce and basil leaves.  Sprinkle with Parmesan cheese, if desired.

*Note: Regarding the tomatoes, for a thinner sauce, use the 28oz can of crushed tomatoes; for a super chunky sauce, use a 28oz can of stewed tomatoes, chopped; finally, if you need to compromise like I do, use one 14.5 oz can of stewed tomatoes, chopped, and one 14.5 oz can of crushed tomatoes.  The 14.5 oz can of crushed tomatoes can be a bit difficult to find (I know Muir Glen makes it), so you may need to double the recipe.  But don't worry, it freezes really well.

Tuesday, November 2

Orzo with mushrooms, tomatoes, and sausage


In the process of my pantry cleaning, I realized that we had a large amount of orzo so I have used it for several different meals.  I've discovered that there is something about the texture of freshly cooked orzo that makes me happy.  Typically, you'll see orzo used in soups or pasta salads, but I like to pair it with sauces (like regular noodles) or stew-type things like chili (where I would normally use rice).  

A perfect example is the above meal: orzo with pesto, mushrooms, tomatoes, and sausage, which is both vegetarian-friendly and vegan-friendly.  I'm not including any recipe because there's really not much to it.  I boiled orzo pasta just like I would regular pasta - Watch it though, because it cooks up quick!  Then I combined it with some homemade pesto, topped it off with sauteed mushrooms (because we all know how much I love them) and diced tomatoes.  Leave it that way for a vegan side dish or add a sprinkle of Parmesan and some sliced sausage on the side and - Voila! - a fairly quick weeknight meal.

Friday, October 29

Onion-free and garlic-free pumpkin chili


I have a confession to make: we eat far more onions and garlic than we're supposed to.  If you've checked out our Restricted Foods page, you've seen the explanation blurb in the Foods Not Yet Assessed section regarding the Allium family.  Up until now, we've been loathe to cut out onions and garlic from our diet because we like their flavor and, quite frankly, it's kind of intimidating cooking without onion or garlic.  I mean, it's rare that a savory recipe doesn't include one or both.  However, according to all the sites I've read on Porphyria and sulfur sensitivities, including multiple anecdotes from people living with Porphyria, all foods in the Allium family should be avoided.  So, that means no onion, no garlic, no chives - none of that!


After doing some research, I found out that onion and garlic are fairly easy to replace as long as they are not the star-player of the recipe.  Essentially, they are just aromatics to give a little (or a lot) of extra oomph to the recipe.  So, to replace the oomph from one aromatic, you need some oomph from another aromatic.  The main suggestion for replacement has been celery.  Unfortunately, I'm not a big fan of celery.   I refuse to eat it if it's raw, but if it's hidden in a meal, well, OK.  Because of this, I've hesitated to even attempt an onion free and garlic free recipe using celery.    

Then I saw Ashley's pumpkin chili.  Not only did the recipe and accompanying photos look amazing (except for the kidney beans - they give me the heeby jeebies), but there wasn't a crazy amount of onion or garlic included.  So I decided it would be my first attempt at an onion free and garlic free recipe.


I plan on writing another post that includes tips and such on cooking onion free and garlic free (If y'all have any tips, please share.).  In the meantime, if you are highly sensitive or allergic double check everything!  I accidentally had traces of both onion and garlic in my recipe; I used a homemade broth that included both and the chili powder I used has garlic powder. 

I cooked the chili uncovered, so it was extra thick.   At that consistency, it would make amazing chili mac or as a sauce base for pizza with some shredded chicken on top.  I didn't get to try any of those options because I finished it, but next time!


Onion free and garlic free pumpkin chili
liberally adapted from (never home)maker with onion free and garlic free inspiration from About.com.

I'm writing this recipe as I cooked it, but please see below for my comments and suggestions.

Ingredients

  • 3-4 stalks of celery, chopped
  • 1-2 teaspoons olive oil
  • 1 1/2 cups cooked dry (or 1 can drained and rinsed) great northern beans
  • 1 1/2 cups cooked dry (or 1 can drained and rinsed) small red beans
  • 1 can corn kernels, drained
  • 1 14 ounce can whole peeled tomatoes, keep the juice
  • 1 14 ounce can crushed tomatoes
  • 1 can pumpkin puree
  • 1 cup vegetable broth
  • 1 tablespoon paprika
  • 1 teaspoon black pepper
  • 1/2 teaspoon cumin*
  • 1/2 teaspoon chili powder
  • 1/4 teaspoon cayenne pepper (optional)
  • 1 tablespoon fresh oregano
  • 1 1/2 teaspoons chopped fresh sage leaves
  • 1/2 to 1 teaspoon salt
  • Optional: 
    • Sliced avocado, shredded cheese, and/or tortilla chips for topping.  
    • For increased carbohydrates: cooked pasta such as macaroni noodles if the chili is thick, orzo if it is thinner.

Directions

In a large saucepan, heat the olive oil over medium-high heat and add the celery. Cook until onions are tender. Pour in the beans, corn kernels, pumpkin puree, tomatoes,  vegetable broth, and seasonings (including herbs).  Mix.

Bring to a boil, stirring occasionally. When stirring, crush the whole tomatoes enough to mix them in a bit, but keep them chunky.  Then lower the heat to a simmer and either cover for a thinner chili or leave uncovered for a thicker chili. Cook for 45 minutes, stirring occasionally.

Verdict & notes:

  • First and foremost, I would increase all the spices, save the cayenne pepper - Dude, that stuff packs some heat!  
  • Second, I would definitely increase (maybe double?) the fresh herbs; I'm still getting used to cooking with fresh herbs, so I've been starting off light.  Also, Ashley originally suggested to add the herbs toward the end, but I really needed them to flavor the mixture, so I added them in the beginning.  Thoughts? 
  • Third, I might increase the celery by a stalk or two; I originally started out with one and a half and had to add some more in at the end (the recipe reflects this).    
  • Finally, the pumpkin doesn't add much flavor, so don't be put off by it's addition to the chili; if you want some of the flavor to shine, add an additional half to a full can of pumpkin puree.  
All that said, I definitely liked this chili.  I ate it a few times without anything else, which is saying something for me.

*If you are being strict about removing all things onion and garlic, leave out the chili powder and substitute with up to 1 tablespoon of ground red pepper and increase the cumin to 1 teaspoon.  I'm not sure how it will taste, but if anyone tries it, please let me know. Also, make your own vegetable broth without the offending onion and garlic (how-to post coming eventually).

Thursday, October 21

Key West coconut butter lime cookies


These cookies are the result of a total fail. I got the idea to make coconut butter from Edible Perspective and, while I had such high hopes for it, I just didn't like it. First, I used shaved coconut instead of coconut flour and I couldn't get it completely smooth so there were little pieces of coconut throughout. Second, and most importantly, I love the smell of coconut, but I don't really like the taste of it! I attempted to improve the flavor a bit by adding a little lime oil, but it didn't work.


I didn't want to waste it so I stuck it in the fridge until I could figure something out to do with it. Finally, I had the brilliant idea to make coconut butter cookies (a la peanut butter cookies).  Success!  These cookies are ridiculously good!  They remind me of  the lime sugar cookies that Tara and I couldn't get enough of during our last trip to the Keys.  One of my friends said that they were a cross between a margarita and Key West (because Key West is a flavor, right?).


What is it about the smell of coconut that makes you think of the beach and summer?


Before I give you the recipe, I present: Cookie Art, by Tara.  :)


Key West coconut lime butter cookies
Adapted from Better Homes and Gardens New Cookbook, 75th year anniversary

A few observations: (1) If you decide to make your own coconut butter (and you should, because these cookies rock), make sure you get unsulphured and unsweetened dessicated coconut.  (2) Both the lime and the coconut (say it with me: put the lime in the coconut...) are actually pretty mild. 

You can purchase your lime oil from Boyajin; I gotta say, they are well worth the money. You can substitute lime extract, but increase the level to 1 teaspoon.  Also, if you're not a fan of lime, you could substitute 1 teaspoon of vanilla extract; I still have some coconut butter left, so I may make a version like this - I bet it would smell amazing!

Ingredients
  • 1/2 cup butter
  • 1/2 cup coconut butter
  • 1 cup granulated sugar
  • 1/2 teaspoon baking soda
  • 1/2 teaspoon baking powder
  • 1 egg
  • 1/2 teaspoon lime oil
  • 1 1/4 cups all-purpose flour
  • Granulated sugar

Directions

Preheat oven to 375F.  In a large mixing bowl beat butter and coconut butter with an electric mixer on medium to high speed for 30 seconds. Add the granulated sugar, baking soda, and baking powder. Beat until combined, scraping sides of bowl occasionally. Beat in egg and lime until combined . Beat in the flour, stirring if necessary. If the dough is difficult to handle, cover and chill for about 30 minutes.

Shape dough into 1-inch balls. Roll in additional granulated sugar to coat. Place 2 inches apart on an ungreased cookie sheet. Flatten by making crisscross marks with the tines of a fork. Bake for 9 to 13 minutes (less for softer cookies) or until bottoms are lightly browned. Transfer to a wrack and let cool.
 

Monday, October 18

Penne with zucchini ribbons and mushrooms


I've been working on a granola post (plus several others) to give you, but I'm still tweaking the recipe, so instead I give you penne with zucchini ribbons and a quick write-up.  (This is your cue to look at me like I'm crazy and say, "But Sunshine, it's Fall!   Zucchinis are for summer."  And to that I say, "Well, somebody needs to tell the people at Publix because they just had zucchini on sale last weak, so there.")

Also, I'm going to refer to the zucchini as zukes, because that what we call them at home and I like the way it sounds.  Hope you don't mind.


This is an awesome meal for both AIP and non-AIP folks.  Because the pasta amount is adjustable, you can have as much or as little carbs as you want or need.   We've had this a few times and I've occasionally just had the zuke noodles and pesto on their own.


Penne with zucchini ribbons and sauteed mushrooms

While not so original, I prefer it topped with sauteed mushrooms just like some other recipes.  Roasted pesto stuffed tomatoes (see Smitten kitchen and Veggie Belly's recipes) are a great accompaniment.

Ingredients
  • 3 zucchini squashes
  • 2+ tablespoons oil, divided
  • 1 tablespoons butter
  • 1/4 - 1/3 cup pesto*
  • 8 oz mushrooms, sliced
  • 1/4 cup pumpkin seeds
  • salt and pepper to taste
  • grated parmesan
  • pasta of your choice

Directions

Pumpkin seeds:
Heat oven to 350F.  Spread pumpkin layers in a single layer on an ungreased baking sheet.  Toast for about 10 minutes.  Keep an eye on these, they go from just right to burned pretty quickly.  A few minutes before they're finished, they'll start to puff up and pop (which is fun to watch, by the way).  When they're done, they seeds will be mostly puffed up and a greenish brown color.  Conversely, you can toast them on the stove top on an ungreased pan over med heat, shaking frequently; I've never actually done it this way, so I can't speak to its effectiveness.  (Because I use so many pumpkin seeds, I usually toast a large batch in the toaster oven and store them so they're recipe-ready.)

Pasta:
Bring a large pot of salted water to boil.  Dump in the pasta, boil for a minute or so and turn off the heat, add 1 tablespoon of the oil, and cover.  Let sit for 10 minutes, stirring occasionally, or until the pasta is cooked to your liking.  Check the pasta frequently after the 10 minute mark to determine when the pasta is done.  I find this method a lot easier to cook pasta than the traditional method. Once the pasta is done, drain and return to the pot. Also, if you don't want to add oil to your pasta, you can rinse it once or twice in cold water (Tara thinks this is blasphemy, but she's also part Italian; I'm part Puerto Rican and can make up my own pasta rules.).

Mushrooms:
While you're waiting for the pasta water to boil, heat a large skillet over med - med/high heat.  Once the pan is hot, add 1 tablespoon of the oil.  After the oil has heated, add the butter and cook until it has foamed.  Add the sliced mushrooms and stir to coat in the butter-oil mixture; season with a little salt and pepper.  Saute the mushrooms until they are done to your liking, 10-15 minutes.  Empty into a bowl.

Zukes:
Prep your zukes while the pasta and mushrooms are cooking; do this first if you're not confident in your speedy kitchen skills. Peel the zukes. Then working around it's length, peel strips of flesh off.  Continue until you get to the seed (You can throw away the remaining bits or use them up in a creative way; I haven't figured this out yet.).  When the mushrooms are done, heat up the remaining oil if you need it (That's the "+" in the recipe.).  Put your zuke strips in the pan and saute for 1-2 minutes, stirring frequently; you want them to soften up a bit, but still have some crispness to them.  When they are done, toss them with the pesto and pumpkin seeds.

To serve, plate the noodles, top with the zuke noodle, pesto, pumpkin seed mixture, and, finally, top with the mushrooms and grated parmesan.


*Note: I just realized that there are no pumpkin seeds in the pictures, but add them anyway.  They give a nice crunch.  Also, we use homemade pesto and since we like ours on the dry side, it takes a little more to get good coverage.  Adjust this to your preferences.

Sunday, October 3

Peanut butter and jelly on whole wheat focaccia


I love a good peanut butter and jelly sandwich.  It's not something I eat regularly, but every so often, I'll get on a kick and I'll eat it for a few days.  (Tara, on the other hand, can't really stomach the stuff and thinks I'm a little bit off for being so enamored with it.)  I'm rather particular about my PB&J: it has to be on whole wheat bread, I like it super rich with lots of peanut butter and lots of jelly, I only like it with grape jelly, and the peanut butter and jelly have to be in even amounts, spread all the way to the edges (I'm almost obsessive about the last two; I'll spend several minutes making sure each slice is the same, even going so far as to hold each slice next to each other to compare.). 


While I could technically use my favorite bread for a sandwich, even though it has soy, I actually wanted to make wheat bread.  However, I'm still a little nervous about making a whole wheat sandwich loaf and I was already making the olive oil bread that same day, so I didn't want to make another loaf style bread.  I decided to buck tradition and make a whole wheat focaccia bread for my sandwiches.   I didn't have any regular whole wheat flour, but I had some graham flour which I figured would add an interesting crunch (much like the addition of cornmeal to pizza).   


I forgot to oil the top of the focaccia, so it baked up a bit wonky and the entire thing was slightly curved.  Because of this, and the deep holes in the bread, I decided not to slice the focaccia pieces in half as you would for a traditional sandwich.  Instead, I flipped each piece over and slathered what would have been the bottom with both the peanut butter and the jelly.  I felt rather daring each time I made a PB&J slice.

Because my peanut butter was so thin, it was hard to get the ratios even.  Believe me, I tried!

Whole wheat focaccia bread
Adapted from Mark Bittman

I followed the recipe below, but I would make a few changes next time.  Mainly, I would use a bit less salt, reduce the oil in the bread to 2 tablespoons, and maybe add a tablespoon or so of honey.  I used my stand mixer, but I'll give directions for mixing it in the food processor or by hand. 

Ingredients
  • 1 1/2 cups bread flour, plus more as needed
  • 1 1/2 cups whole wheat graham flour (or regular whole wheat)
  • 1 1/2 cups (or more) water
  • 2 teaspoons instant yeast
  • 2 teaspoons kosher salt
  • 4 tablespoons extra virgin olive oil, divided
Directions

Stand mixer: Combine half the flours with the salt, yeast, 3 tablespoons of the oil, and water.  Using the paddle blade, blend until smooth.  With the machine on slow speed, add the remaining flour a little at a time, until the mixture has become a sticky ball that pulls away from the sides of the bowl (switch to the dough hook, if needed).  Knead by hand for one minute, adding as little flour as necessary.  Proceed below.

Food processor: Combine the flours, yeast, and salt in a food processor.  Turn the machine on and add 3 tablespoons of olive oil through the feed tube, followed by 1 1/2 cups of water.  Process for about 30 seconds, adding more water, a little at a time, until the mixture forms a ball and is slightly sticky to the touch.  Proceed below.

By hand: Combine half the flours with the salt and yeast in a large bowl and stir to blend.  Add the oil and water and stir with a wooden handle until smooth.  Add the remaining flour a little at a time.  When the mixture becomes too stiff to stir with a spoon, begin kneading, adding as little flour as possible - just enough to keep the dough from being a sticky mess.  Knead until smooth but still quite moist, about 10 minutes.  Proceed below.

Form a smooth, round dough ball, put it into a bowl, and cover with plastic wrap.  Let rise until the dough doubles in size, 1 to 2 hours.  When the dough is ready, shape the dough into a ball.  Put the ball on a lightly floured surface, sprinkle with a little flour, and cover with plastic wrap (I used the same piece as before).  Let rest until the dough puffs slightly, about 20 minutes.

Use the remaining tablespoon to grease an 11x17-inch jelly roll pan (I think my pan dimensions are a little different.).  Press the dough into a small rectangle and put it into the pan; let it relax there for a minute.    Press and stretch the dough until it reaches the edges of the pan.  (I didn't have any trouble with this step, but if you do, the key is to take your time and don't fight the dough!)  If it resists, let it rest a bit and then begin stretching again.  Cover the dough with plastic wrap and let it rest for at least 30 minutes. 

Heat the oven to 425F . Uncover the dough and dimple the surface all over with your fingertips.  Brush the surface of the dough with a little olive oil (I forgot this and it was a little dry.  While this wasn't a problem for me because I intended it to be covered with peanut butter and jelly, your mileage may vary.).  Put the focaccia in the oven and lower the temperature to 375F, and bake for about 30 minutes or until golden brown and crisp.  Remove and cool on a rack.

Note: This focaccia freezes really well, so don't worry if you're not going to eat it all right away.  Also, you could, of course, use this recipe as a base for toppings; just prepare it like I did for the butternut squash flatbread.

This post has been submitted to Yeastspotting.

Thursday, September 2

Cantaloupe and blueberry salad


Ever see a recipe and know that you need to make it as soon as possible, even before all the other recipes that you have already lined up? That's what happened when I saw this cantaloupe and blueberry salad over at Indian Simmer

New melon baller...

The preparation was so simple, but it looked so elegant; I had to make it that night to serve with dinner.  I was so excited, I even bought a melon baller.

Don't hate on our soccer ball bowls!


Cantaloupe and blueberry salad
Adapted from Indian Simmer

I made a few changes to the original recipe, which are reflected here.  Mainly, I nixed the red pepper flakes and toasted almonds; feel free to add those if you'd like.  Next time, I would probably add toasted walnuts or pecans for some crunch.  I only used half of a cantaloupe for the salad, which was more than enough as a side dish split between the two of us.  If you want to make it a main dish for lunch, etc., use an entire melon and double the ingredients. 

Ingredients

  • 1/2 medium size cantaloupe
  • 1/2 cup blueberries
  • 1/4-1/2 tsp salt*
  • 1/2 - 1 tbsp lemon juice*
  • 1 tbsp chopped sweet basil leaves (mint would also be good)

Directions:

Using a melon baller, scoop out bite sized pieces of cantaloupe, reserving the melon shell.  Mix all the ingredients together in a bowl (I let it sit for an hour or so in the fridge to let the flavors meld).  Serve the salad in the reserved melon bowl. 

*Note: If you decrease the lemon like I did, be sure to decrease the salt like I didn't; it will balance the flavors a bit more.

Monday, August 30

Olive oil bread


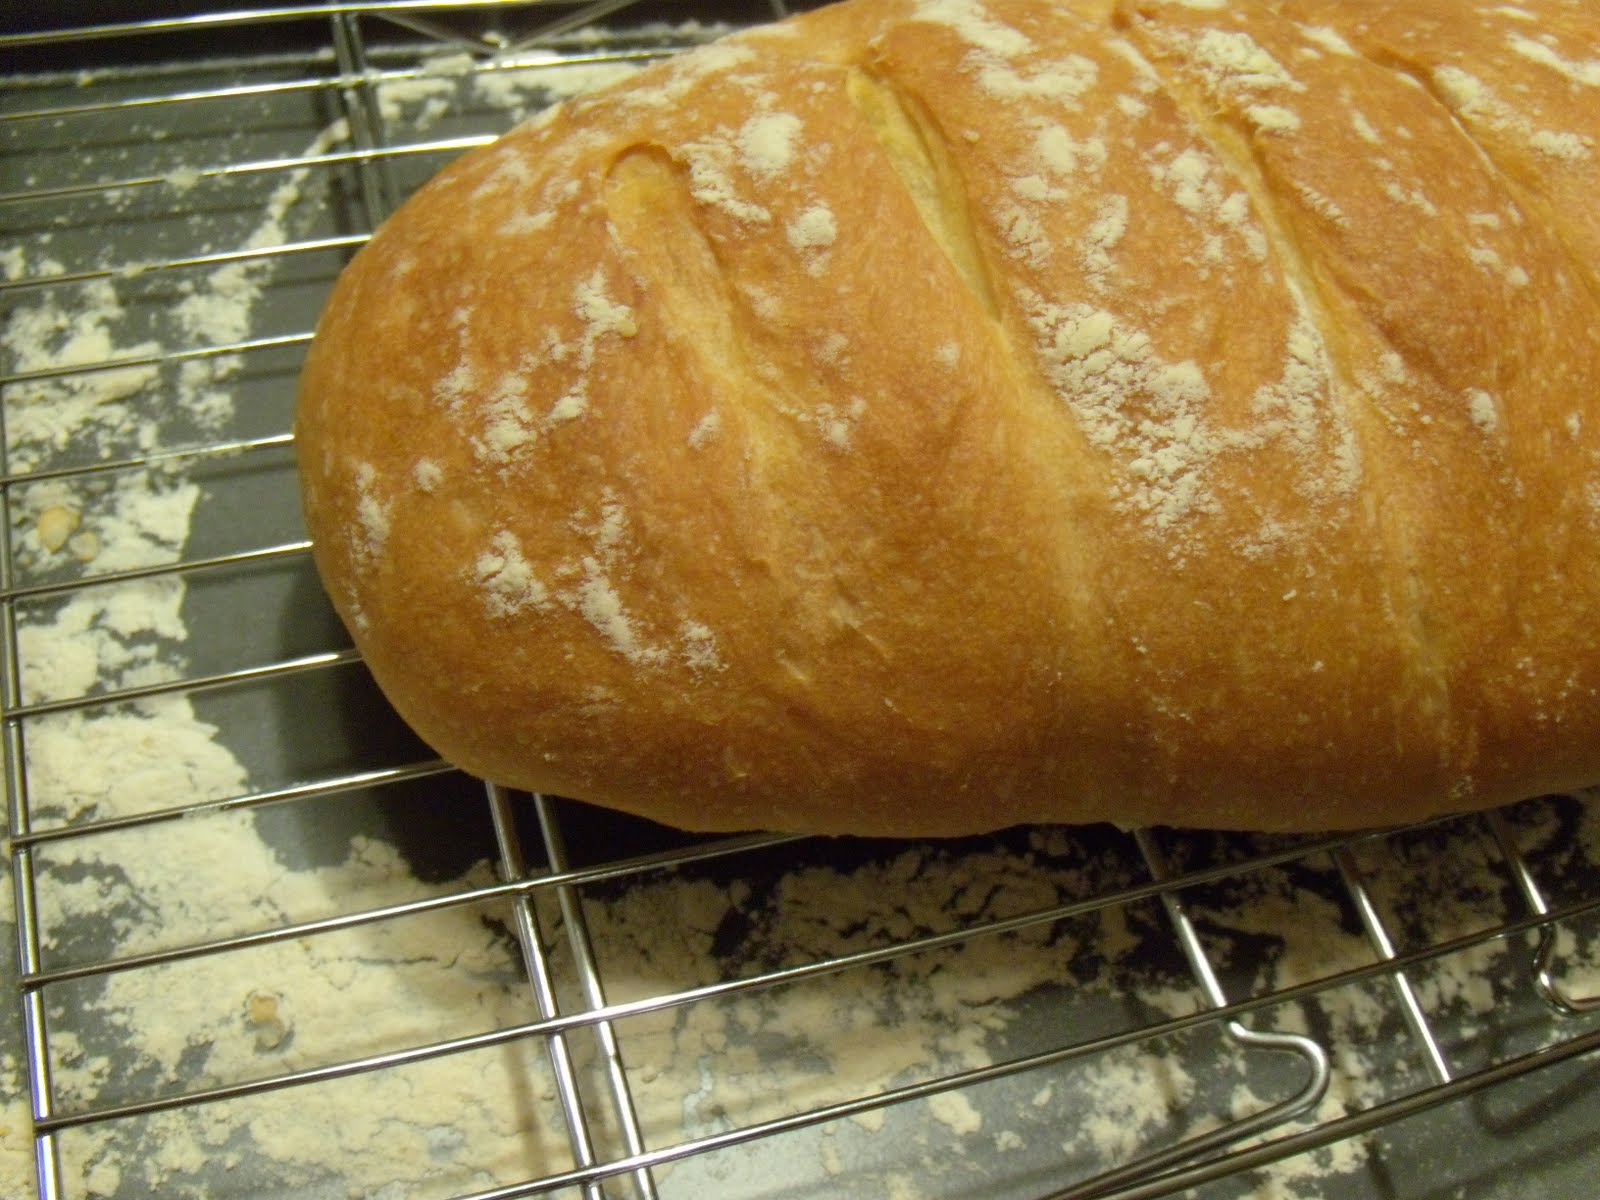
We all know how much I like the avocado/olive oil toast combo, right?  I wasn't happy with my first attempt at homemade olive oil bread, so I knew that I would make it again.  I finally did that the other night.  I gotta say, I was pretty impressed with myself on this one.  I'm not sure why this version was so successful, but I think it had to do with using bread flour and having the oven sufficiently warmed up.


Olive oil bread
From Mark Bittman's How to Cook Everything

I mixed the dough in my stand mixer, but I will give instructions for doing it in the food processor or by hand.

Ingredients
  • 3 cups all-purpose or bread flour, plus more as needed (I used bread flour)
  • 1 cup water
  • 2 teaspoons instant yeast
  • 2 teaspoons kosher salt
  • 1/3 cup extra virgin olive oil
Directions

Stand mixer: Combine half the flour with the salt, yeast, oil, and water.  Using the paddle blade, blend until smooth.  With the machine on slow speed, add the remaining flour a little at a time, until the mixture has become a sticky ball that pulls away from the sides of the bowl (switch to the dough hook, if needed).  Knead by hand for one minute, adding as little flour as necessary.  Proceed below.

Food processor: Combine the flour, yeast, and salt in a food processor.  Turn the machine on and add olive oil through the feed tube, followed by 1 cup of water.  Process for about 30 seconds, adding more water, a little at a time, until the mixture forms a ball and is slightly sticky to the touch.  Proceed below.

By hand: Combine half the flour with the salt and yeast in a large bowl and stir to blend.  Add the oil and water and stir with a wooden spoon until smooth.  Add the remaining flour a little at a time.  When the mixture becomes too stiff to stir with a spoon, begin kneading, adding as little flour as possible - just enough to keep the dough from being a sticky mess.  Knead until smooth but still quite moist, about 10 minutes.  Proceed below.

Form a smooth, round dough ball, put it into a bowl, and cover with plastic wrap.  Let rise until the dough doubles in size, 1 to 2 hours.  When the dough is ready, shape the dough into an oval shape.  Put the dough on a lightly floured surface, sprinkle with a little flour, and cover with plastic wrap (I used the same piece as before).  Let rest until the dough puffs slightly, about 20 minutes.

Pinch the bottom of the oval to seal the seam as best you can.  Sprinkle all over with flour and put on a well-floured baking sheet.  Let rise, covered, for at least an hour and preferably longer, up to 2 hours (I did this for an hour and a half).  Slash the top of the bread several times.

About 30 minutes before you're going to bake, heat the oven to 425F.  If you have a pizza stone, put it on the bottom rack.  If you don't, on the oven floor, put a shallow ovenproof pot (I use 2 old metal bread making pans) half-filled with ordinary (but clean) rocks.  Boil some water.  Just before putting the bread in the oven, carefully pour boiling water to just over the top of the stones.  Close the oven door.  A minute later, put in the bread and start baking, turning the heat down to 375F.  If you like your bread a little bit darker, bake the bread at 425F until the bread just begins to brown, then turn the heat down.

Bake until the crust is golden brown and the internal temperature of the bread is at least 210F on an instant-read thermometer, about 40 to 60 minutes.  Remove and cool on a wire rack.

This post has been submitted to Yeastspotting.
Related Posts Plugin for WordPress, Blogger...